> For the complete documentation index, see [llms.txt](https://docs.duplocloud.com/docs/llms.txt). Markdown versions of documentation pages are available by appending `.md` to page URLs; this page is available as [Markdown](https://docs.duplocloud.com/docs/automation-platform/overview/quick-start/quick-start-duplocloud-docker-services/step-6-create-loadbalancer.md).
# Step 6: Create a Load Balancer
Create a Load Balancer to expose the native Docker Service
Now that your DuploCloud Service is running, you have a mechanism to expose the containers and images in which your application resides. Since your containers are in a private network, you need a Load Balancer to make the application accessible.
In this step, we add a Load Balancer Listener to complete this network configuration.
*Estimated time to complete Step 6: 15 minutes.*
## Prerequisites
Before creating a Load Balancer, verify that you completed the tasks in the previous tutorial steps. Using the DuploCloud Portal, confirm that:
* An [Infrastructure and Plan](/docs/automation-platform/overview/quick-start/step-1-infrastructure.md) exist, both named **NONPROD**.
* A Tenant named [**dev01** has been created](/docs/automation-platform/overview/quick-start/step-2-tenant.md).
* An EC2 Host named [host01 has been created](/docs/automation-platform/overview/quick-start/quick-start-duplocloud-docker-services/step-4-create-ec2-host.md).
* A Service named [**demo-service-d01** has been created](/docs/automation-platform/overview/quick-start/quick-start-duplocloud-docker-services/step-5-create-app-via-docker-native.md).
## Creating a Load Balancer using Native Docker
1. In the **Tenant** list box, select **dev01**.
2. Navigate to **Docker** -> **Services**.
3. Select the Service **demo-service-d01** [that you created](/docs/automation-platform/overview/quick-start/quick-start-duplocloud-docker-services/step-5-create-app-via-docker-native.md).
4. Click the **Load Balancers** tab.
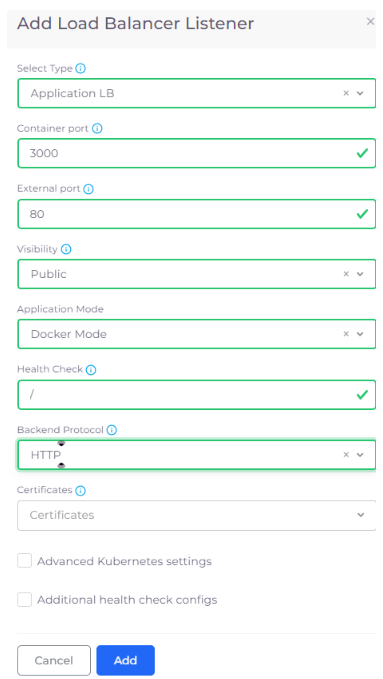
5. Click the **Configure Load Balancer** link. The **Add Load Balancer Listener** pane displays.
6. From the **Select Type** list box, select **Application LB**.
7. In the **Container Port** field, enter **3000**: the port on which the application running inside the container image (**duplocloud/nodejs-hello:latest**) is running.
8. In the **External Port** field, enter **80**.
9. From the **Visibility** list box, select **Public**.
10. From the **Application** list box, select **Docker Mode**.
11. In the **Health Check** field, enter **/**, indicating that you want the Kubernetes Health Check logs written to the **root** directory.
12. From the **Backend Protocol** list box, select **HTTP**.
13. Click **Add**.
The Add Load Balancer Listener pane
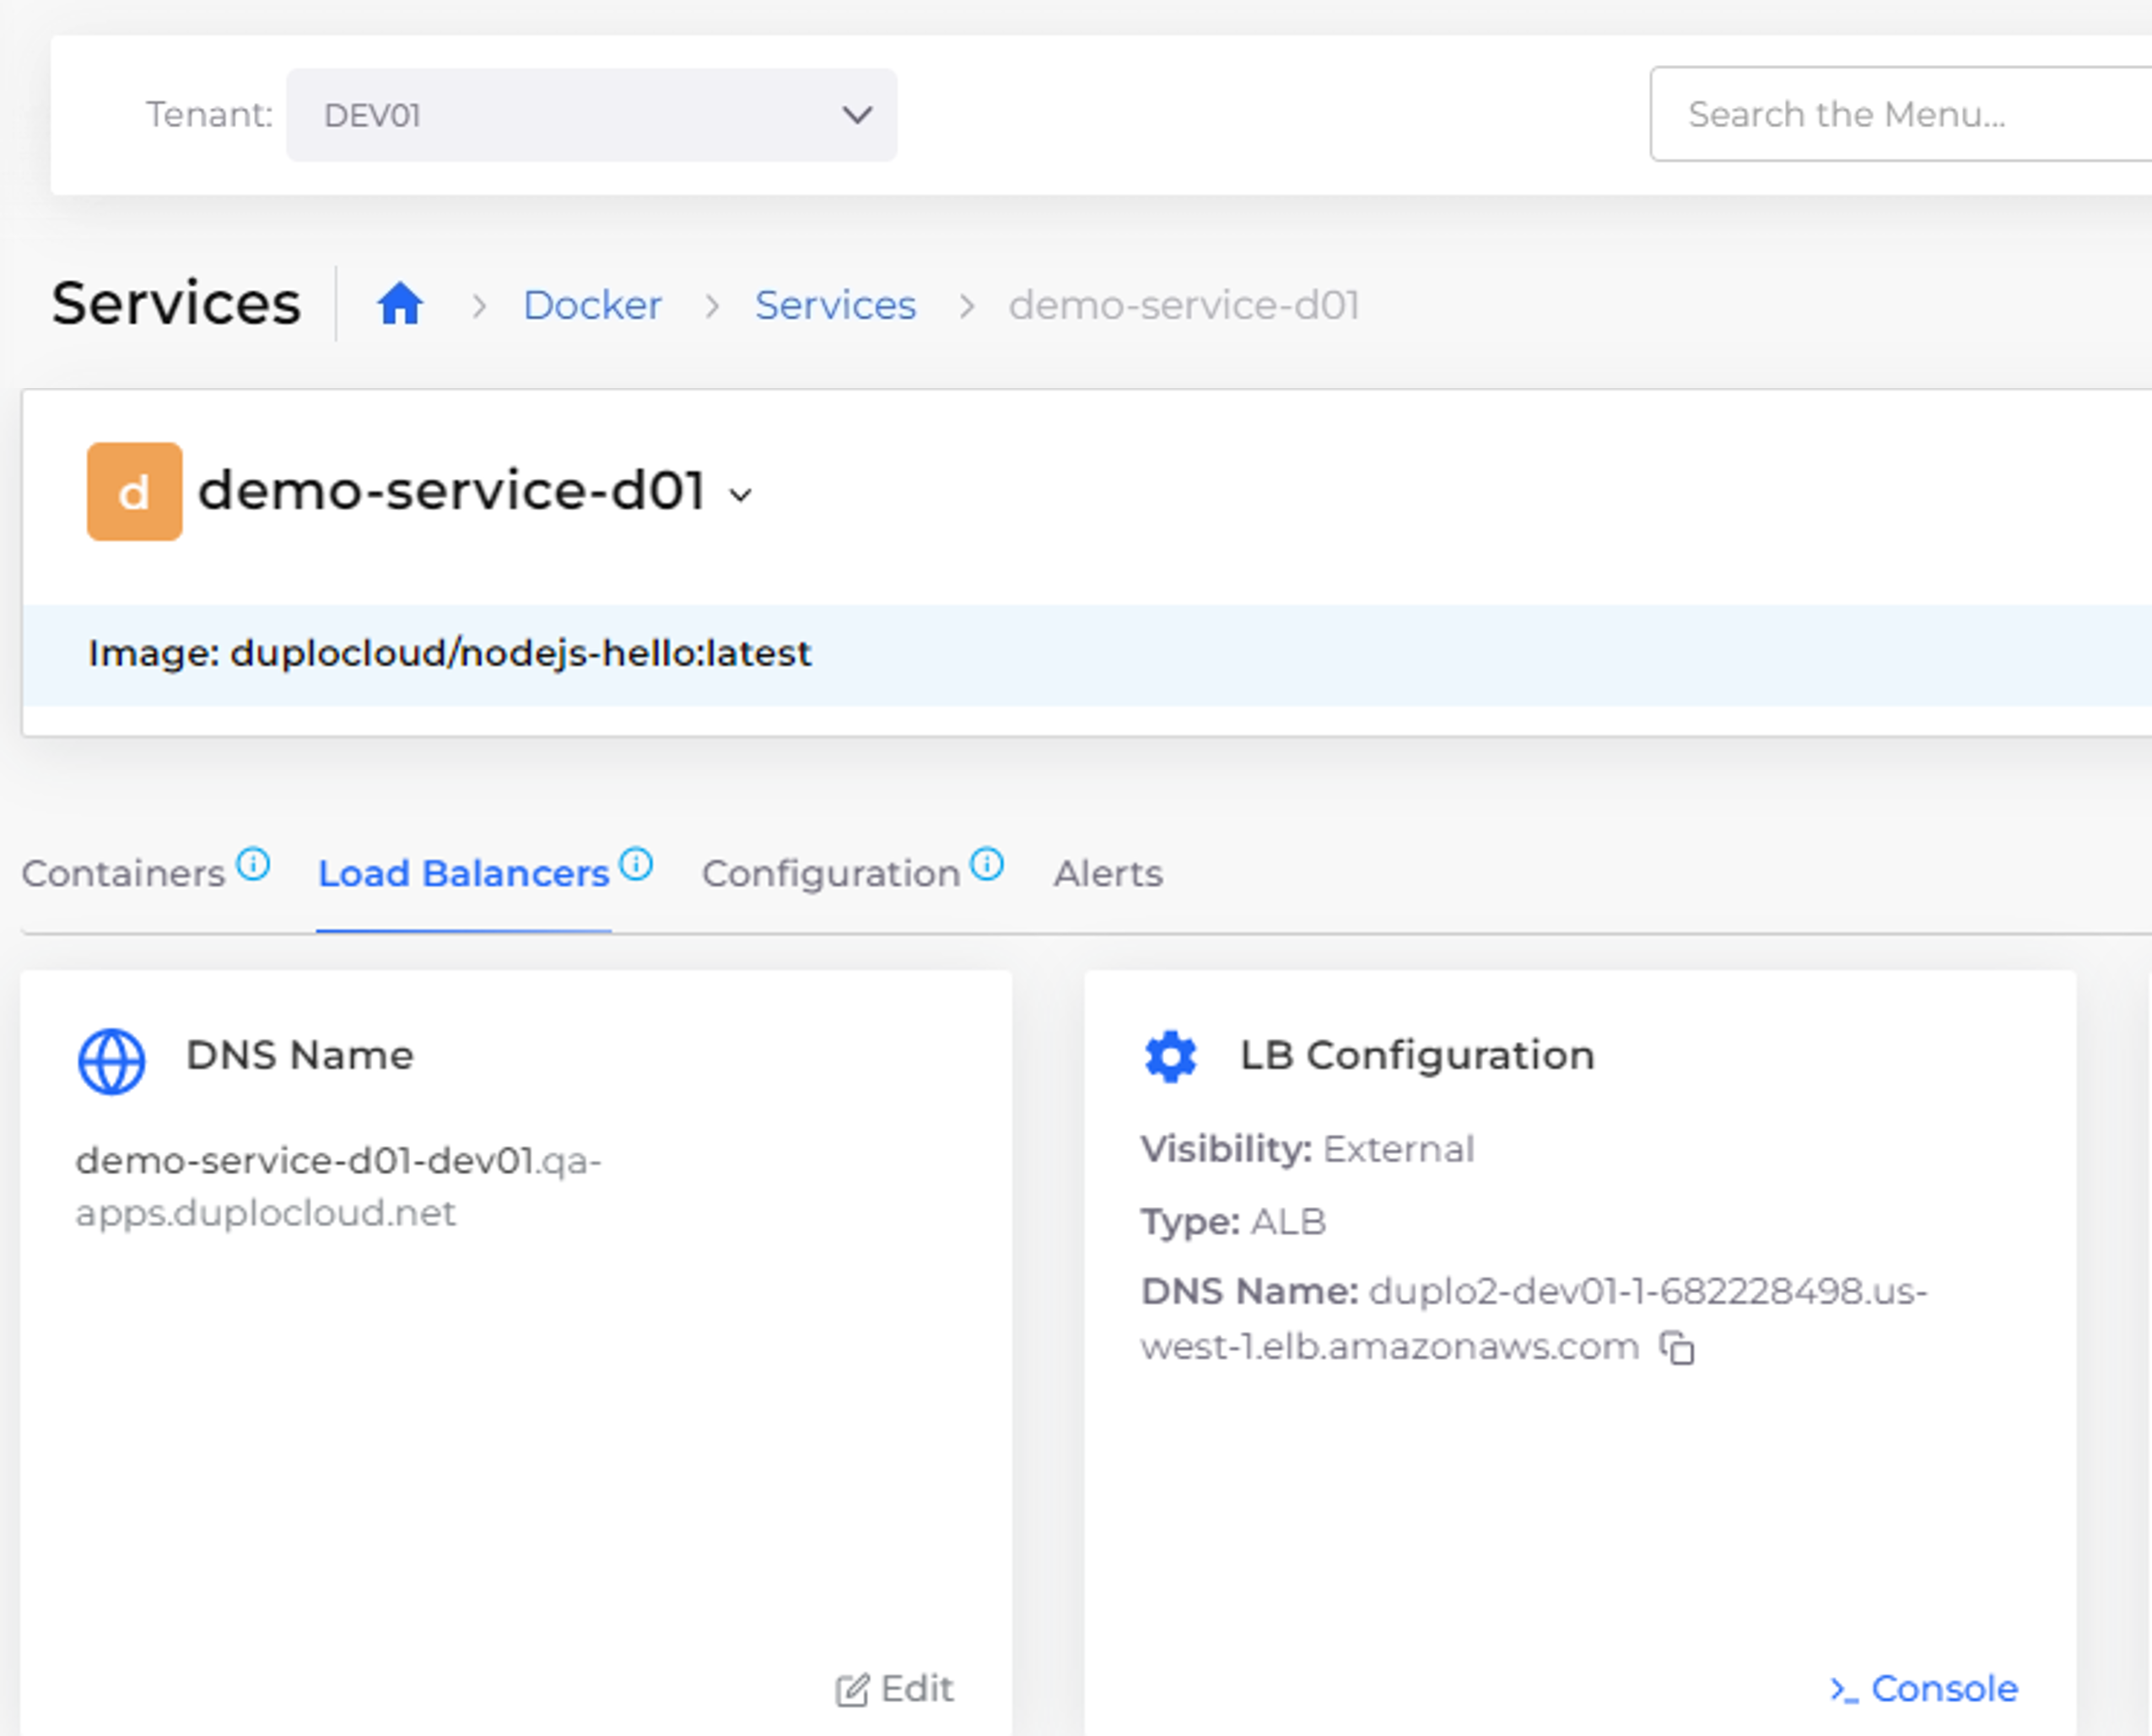
When the **LB Status** card displays **Ready**, your Load Balancer is running and ready for use.
The Services page with LB Status Ready
### Securing the Load Balancer
If you want to secure the load balancer created, you can follow the steps specified [here.](/docs/automation-platform/overview/quick-start/quick-start-eks-services/step-7-secure-the-load-balancer.md)
### Creating a Custom DNS Name
You can modify the DNS name by clicking Edit in the DNS Name card in the Load Balancers tab. For more info about DNS setup and custom DNS names, see the [DNS Configuration documentation](/docs/automation-platform/duplocloud-prerequisites/resolving-dns-failures.md).
The DNS Name card in the Load Balancers tab
---
# Agent Instructions
This documentation is published with GitBook. GitBook is the documentation platform designed so that both humans and AI agents can read, navigate, and reason over technical content effectively. Learn more at gitbook.com.
## Querying This Documentation
If you need additional information that is not directly available in this page, you can query the documentation by asking a question.
Perform an HTTP GET request on the following URL with the `ask` and `goal` query parameters:
```
GET https://docs.duplocloud.com/docs/automation-platform/overview/quick-start/quick-start-duplocloud-docker-services/step-6-create-loadbalancer.md?ask=&goal=
```
`ask` is the immediate question: it should be specific, self-contained, and written in natural language.
`goal` is what the user is ultimately trying to achieve, the reason they need the answer. Sharing it helps GitBook give you a better, more relevant answer. A goal is most helpful when it describes the outcome the user wants rather than restating the question. For example, with `ask=how do I create an API token`, a goal like `automate deployments from our CI pipeline` lets GitBook tailor the answer to that use case.
The response will contain a direct answer to the question and relevant excerpts and sources from the documentation.
Use this mechanism when the answer is not explicitly present in the current page, you need clarification or additional context, or you want to retrieve related documentation sections.
.png?alt=media&token=4acd3c51-b8c1-47da-847a-2e7ebf53d16f)